The following filework can be completed using these files which can be obtained from MSC
Nicholson 6-1/4“ Swiss pattern files.
In place of the marking file, you can use a half round and grind the teeth off the flat side
You can find them here: http://shorinternational.com/fileshalfrd.htm
#2 cut # 60304326 (medium)
#4 cut # 60304334 (fine)
#6 cut # 60304342 (very fine)
Round file- #0 cut #60304425
#2 cut #60304433
#4 cut #60304441
#6 cut #60304458
Three square- #0 cut #60304698
#2 cut #60304706
#4 cut #60304714
#6 cut #60304722
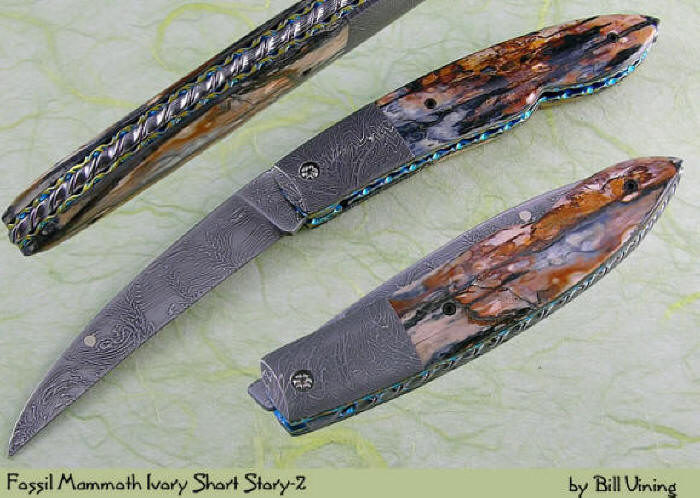
I don’t usually mark my blade or spring for rope type filework unless I’m doing it on a two bladed folder. The main thing to remember on all filework is to keep everything symmetrical and consistent. You can really add to the beauty of a knife or mess a nice knife up. A knife should always be able to stand on its own without any embellishment. And then to add anything just adds to the beauty of it.
Step 1. Take your chainsaw file or rat tail file and make cuts at a 45 degree angle on top of your material, not at a compound 45 degree angle, just flat across the top. Go about a third of the files diameter deep. After you’ve made your first cut, gauge the width of the cut and leave about that same amount of space between that cut and your next cut. Refer to the drawing. Do this the length of desired filework.
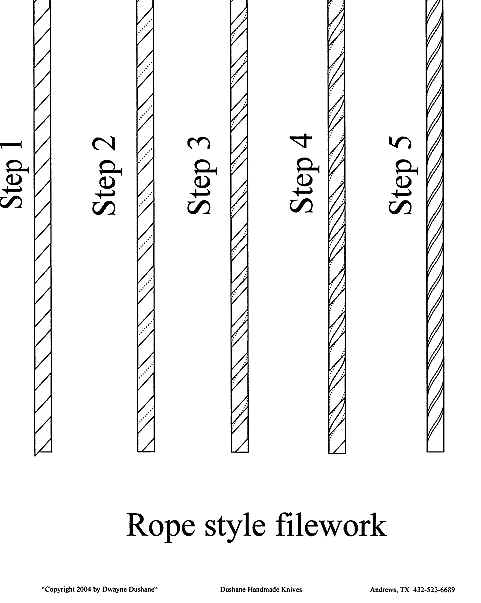
Step 2. Take your modified marking or modified three square file and make cuts in the middle of the flat uncut spaces in between the cuts from the previous step as shown with dotted lines in step 2 on the drawing. Go about the same depth as you did on the cut with the round or rat tail file. You can flip the file over to keep the cut centered between the two round cuts.
Step 3. Now this is going to be kind of hard to explain, so I hope you paid attention in class, take your marking file or your three square file and start cutting imagining the dotted lines on step 3 of the drawing. You’re going to start rolling your file from almost parallel with your blade or spring at about a 45 degree angle coming up and over the top of your work going from parallel to 45 degrees on top and then back to parallel on the other side, flipping your file over from time to time as to crawl your cut forward or backward depending on what’s needed.
Step 4. Now you’re going to start making the round cuts start to flow along the same lines that your previous cuts do. With the round or rat tail file you’re going to use it the same way as you did on the previous step with the marking or three square file. From almost parallel, up and over the top at a 45 degree angle and back down the other side to almost parallel.
Step 5. Now you’re just going to keep at it with your course files until you’ve got it taking the shape you’re wanting and then graduate to the finer files. Once you’ve gotten to the fine files, and all of the course marks our out, you can buff this and it will be amazing! A really beautiful and eye catching thing is to do this pattern on a two bladed folder like a trapper. where your blades and springs are the same thickness and the same length but have your filework a mirror image of each other. In other words having your cuts go from left to right on one blade and spring and go from right to left on the other. When you do this and finish the knife, you can roll the knife back and forth and the light will bounce off in different directions looking like the blades and springs are moving opposite of each other.
Example of rope filework